Breakeven Move Rules
 By LuxAlgoAug 9, 2026
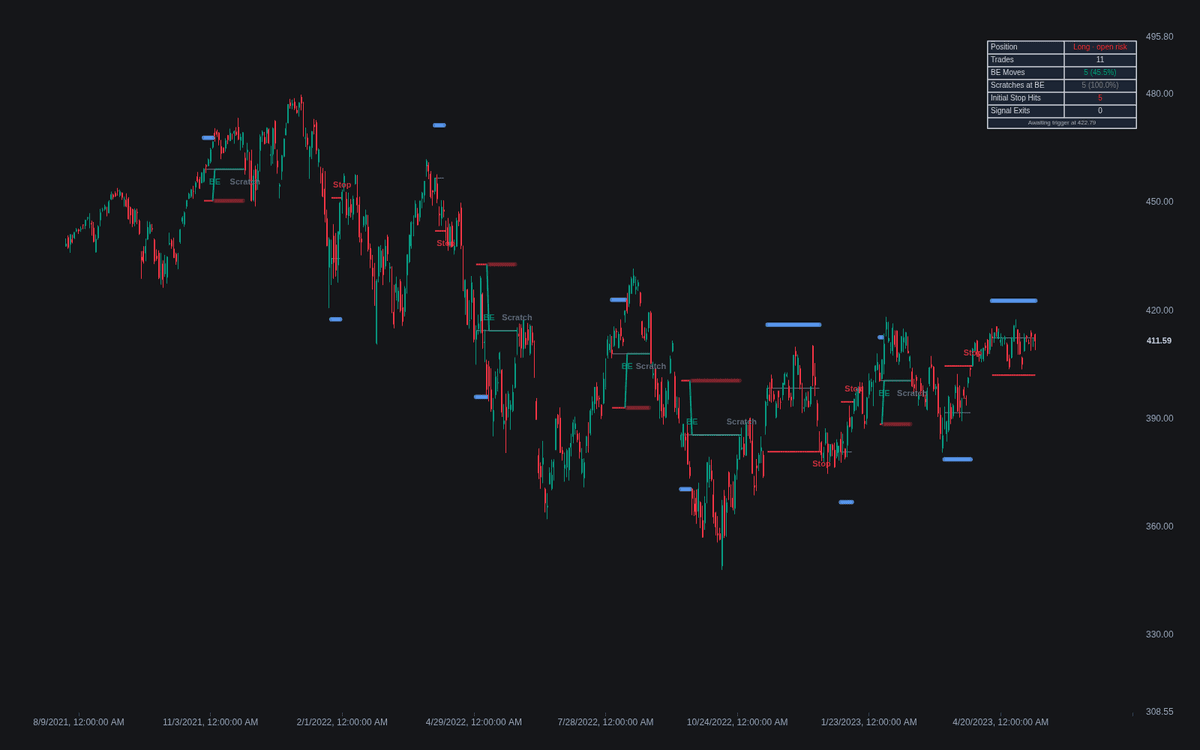
Breakeven Move Rules gives breakeven move rules a measurable chart form for the first time. A demo entry engine — 20/50 SMA crosses — opens simulated trades; the rule then does its one job: once the trigger is reached, one initial-risk unit by default, the stop jumps to entry plus a small buffer and is never loosened. The chart draws the managed Stop and Entry lines, the Breakeven Trigger level, and a gradient that flips from open-risk to protected at the move. A dashboard tallies trades, BE moves, scratches, initial-stop hits and signal exits — the rule judged on counts, not doctrine.
How to Trade the Breakeven Move Rules?
- BE label: the trigger was reached and the stop moved — open risk is now roughly zero and the worst case a scratch, gaps aside.
- Scratch label: the breakeven stop was tagged after the move — the cost side of the rule, since entry areas are revisited on normal pullbacks.
- Stop label: a full initial-risk loss before any move — the losers no breakeven rule can help.
- Dashboard shares: BE moves per trade and scratches per move show what the rule does on your market.
Breakeven Move Rules Settings
- Trade Direction (default Long & Short).
- Fast MA Length (default 20) and Slow MA Length (default 50): the demo entry engine.
- Placement (default ATR Multiple) with ATR Length (default 14), ATR Multiple (default 2) and Percentage (default 1): sets the initial stop, and so the risk unit R.
- Trigger (default R Multiple) with Trigger Multiple (k) (default 1), Trigger ATR Multiple (default 1), Fixed Distance (Ticks) (default 100) and Swing Length (default 5): what must happen before the stop moves.
- Trigger Price (default Intrabar High/Low): or confirmed closes for a stricter rule.
- Breakeven Buffer (Ticks) (default 2): offset so a scratch still covers round-trip costs.
- Dashboard and style toggles cover the panel, event labels, entry markers and the gradient.
Frequently Asked Questions
How is a breakeven move different from a trailing stop?
The breakeven move is one discrete jump — after it, the stop sits still. A trailing method such as the Chandelier Exit keeps following price, protecting open profit rather than just neutralizing entry risk.
Is +1R the right trigger?
It is a convention, not a derived optimum. Earlier triggers protect sooner but multiply scratches; later ones keep more trades alive at the cost of more full losses.
Why does New Swing mode place the stop away from entry?
Because entry is one of the most retested prices on any chart. That mode waits for a swing to form beyond entry and hides the stop behind it, offset by the buffer.

The Library is free. Quant makes it yours.
Pull any concept or indicator into Quant: rebuild it, retune it, or turn it into a backtested strategy of your own.