Rejection Block
 By LuxAlgoJun 8, 2026
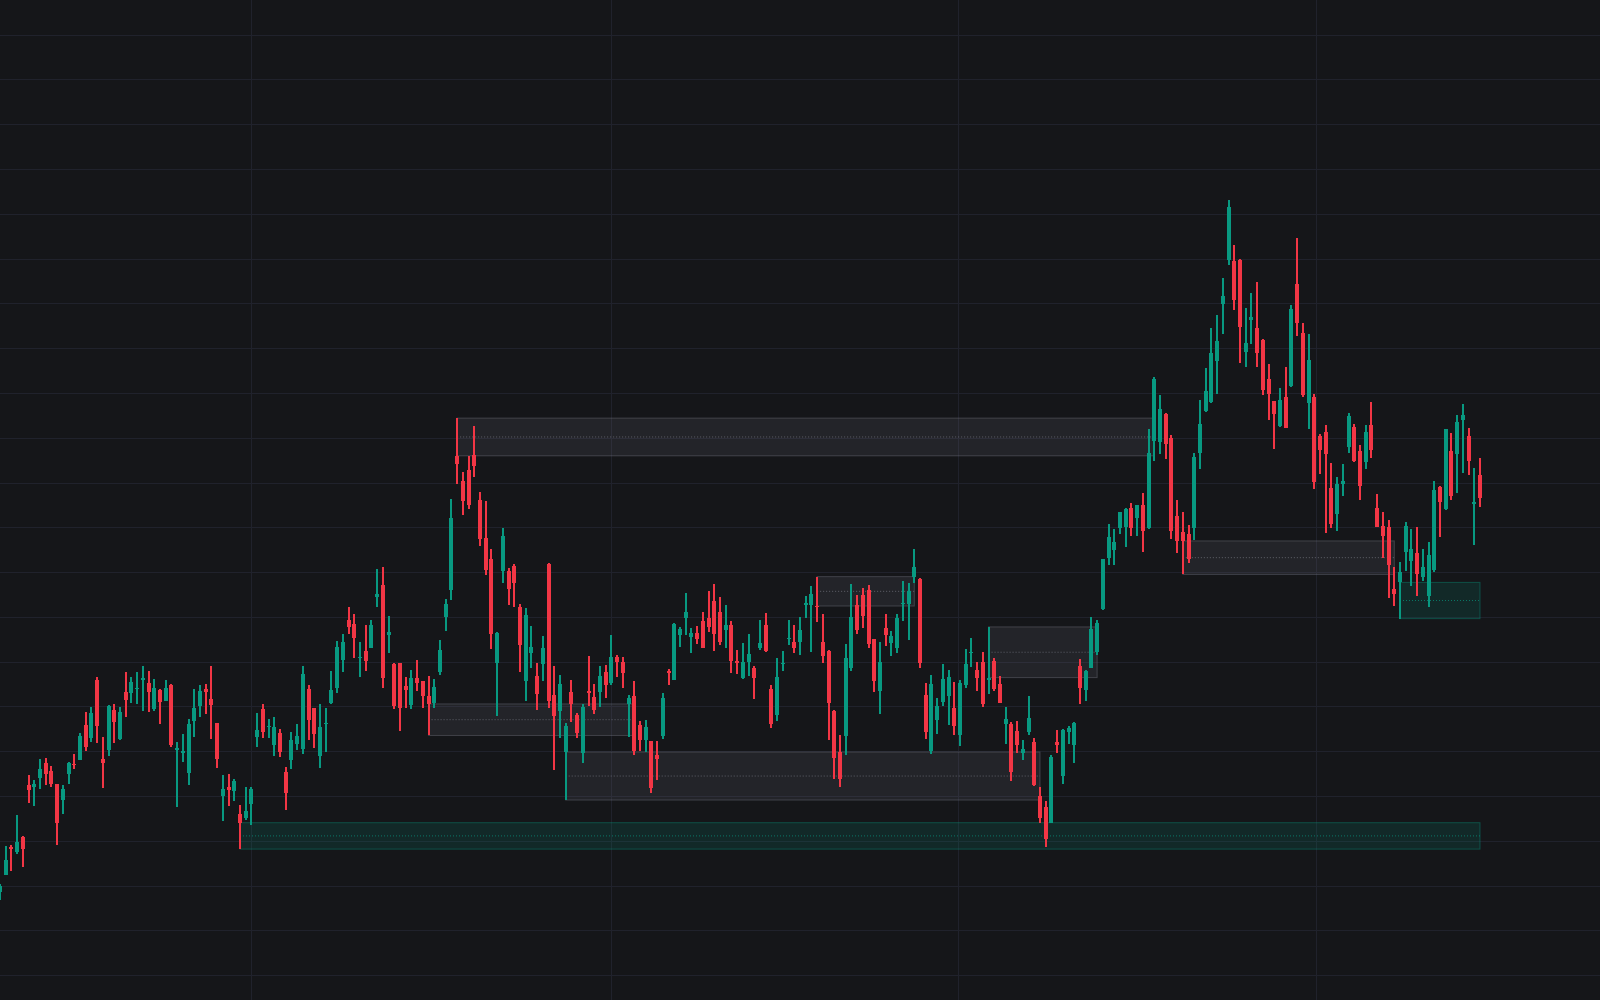

Rejection Block marks the wick spans left at confirmed swing extremes, the footprint of traders filled at a move's extreme and stranded by the reversal. The definitive clean build of the rejection block qualifies every zone before drawing it: the swing must hold for 10 bars on each side, the rejecting wick must take at least half the candle's range, and it must measure at least 0.5 ATR(14). Bearish zones run from the top of the swing candle's body to its high; bullish zones mirror it from body bottom to low.
How to Trade the Rejection Block?
- Zone formed: a confirmed swing prints a dominant wick and the span is boxed, bearish at swing highs, bullish at swing lows.
- First retest: a zone arms only once price leaves the area; the first return into the wick span is the staging area (entries at the near edge or midline, stop just beyond the extreme).
- Invalidation: a body close beyond the wick's extreme reads the zone as spent. It freezes in the invalidated color.
Six alerts cover formation, first retest and invalidation for both directions.
Rejection Block Settings
- Swing Length (default 10): bars on each side confirming the swing; larger values keep only prominent extremes.
- Minimum Wick % (default 50): minimum share of the candle's range the rejecting wick must take.
- Minimum Wick Size (default 0.5) with × ATR (default 14): the wick must also measure this many ATRs; 0 disables the filter.
- Require Liquidity Sweep (default disabled): keep only blocks whose wick ran the prior swing point and closed back through it.
- Show Last (default 10): maximum zones kept, active and invalidated together.
- Style inputs set colors, the Zone Midline (default enabled, Dotted) and whether invalidated zones stay visible (default enabled).
Frequently Asked Questions

Original indicatorBuilt in-house by LuxAlgo
The Library is free. Quant makes it yours.
Pull any concept or indicator into Quant: rebuild it, retune it, or turn it into a backtested strategy of your own.