Exhaustion Bar
 By LuxAlgoJun 21, 2026
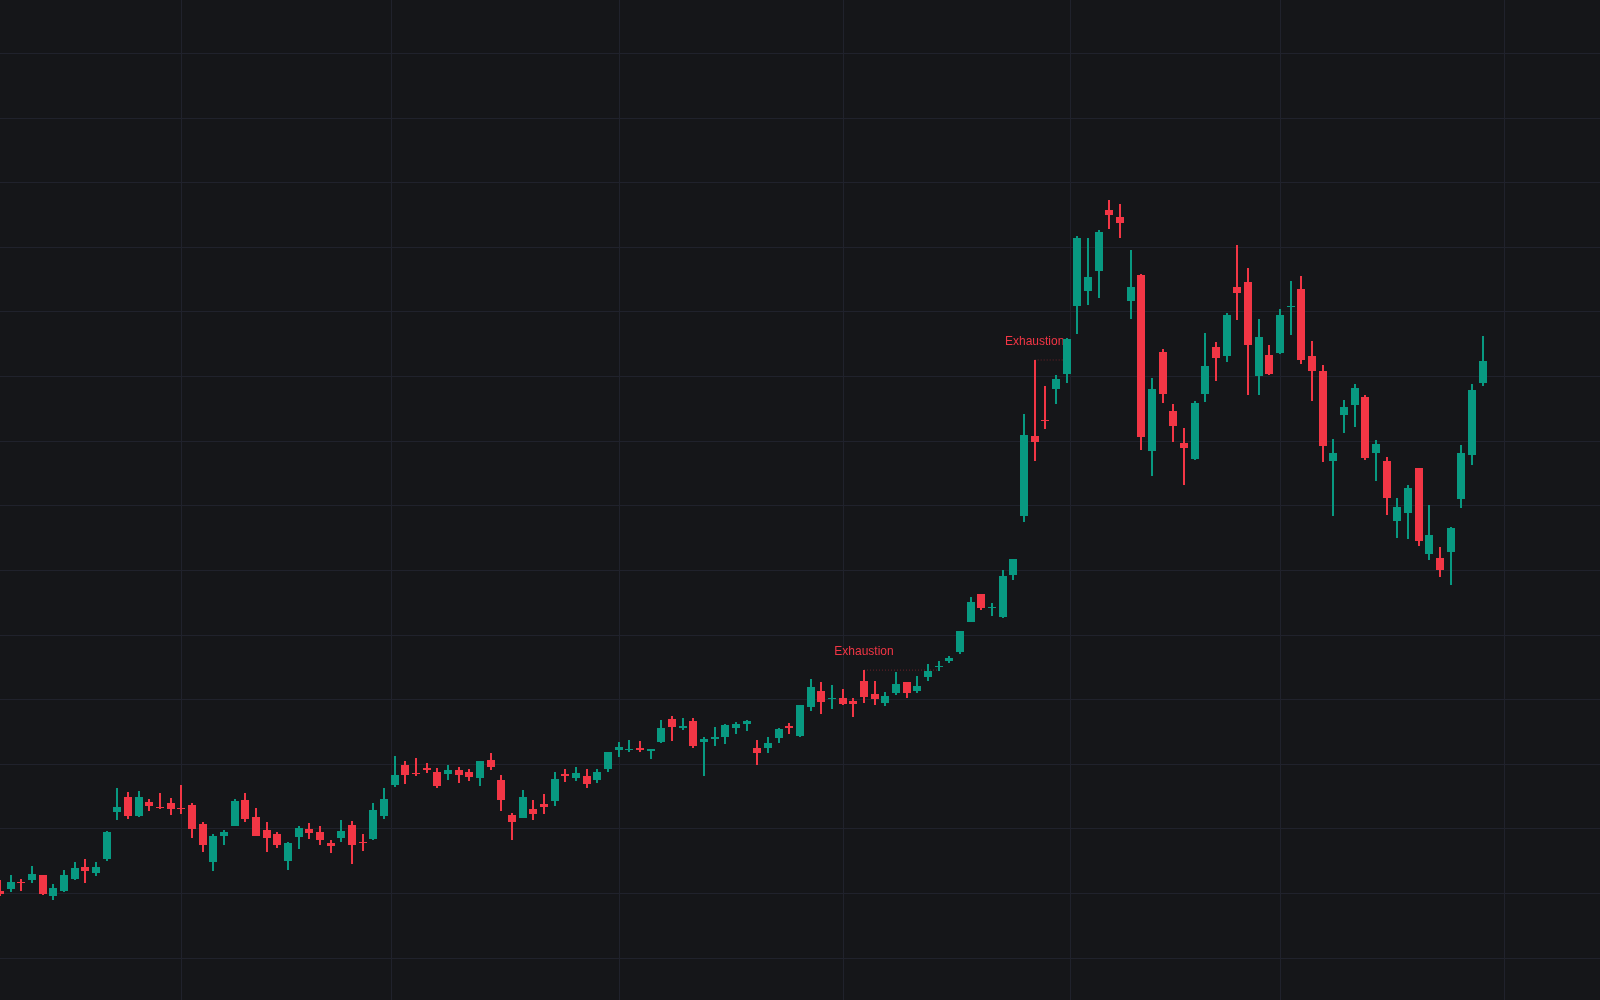

Exhaustion Bar codifies the maximum-effort, minimal-result candle into checks that must all pass: an extended prior move of the required ATR multiple, a fresh extreme of the lookback, a range well beyond the recent average (optionally with a participation spike) and a close near the bar's opposite extreme, by default back inside the prior bars' range so the excursion is left as a rejected wick. The exhaustion bar is only hunted where there is something to exhaust.
How to Trade the Exhaustion Bar?
- Pattern label: marks the qualifying candle; its tooltip itemizes range and volume ratios, close location and the prior move.
- Extreme levels: each wick tip extends forward. The natural stop sits beyond it, and a close accepted beyond it turns the level dotted and fires the invalidation alert.
- Confirmation: optionally require the next bar's close beyond the midpoint or opposite extreme before marking: later but substantially cleaner.
Exhaustion Bar Settings
- Trend Lookback (default 20): bars measuring the prior move and its extreme.
- Minimum Prior Move (ATR) (default 2) with ATR Length (default 14): how stretched the trend must be (0 = direction only).
- Effort Average Length (default 20): baseline for the range and volume checks.
- Wide Range Multiplier (default 1.5): required multiple of the recent average range.
- Require Volume Spike (default on) with Volume Spike Multiplier (default 1.5): skipped without volume data.
- Close Location % (default 25): how near the opposite extreme the close must finish.
- Close Back Inside Prior Range (default on) and Require Gap Open (default off): the rejected-probe and gap-open variants.
- Confirmation (default None): Close Beyond Midpoint or Close Beyond Opposite Extreme.
- Display: Extreme Levels (on), Show Last Levels (default 8), Show Pattern Labels (on), Highlight Pattern Candles (off).
Frequently Asked Questions

Original indicatorBuilt in-house by LuxAlgo
The Library is free. Quant makes it yours.
Pull any concept or indicator into Quant: rebuild it, retune it, or turn it into a backtested strategy of your own.