Volatility Regime Switches
 By LuxAlgoJun 4, 2026
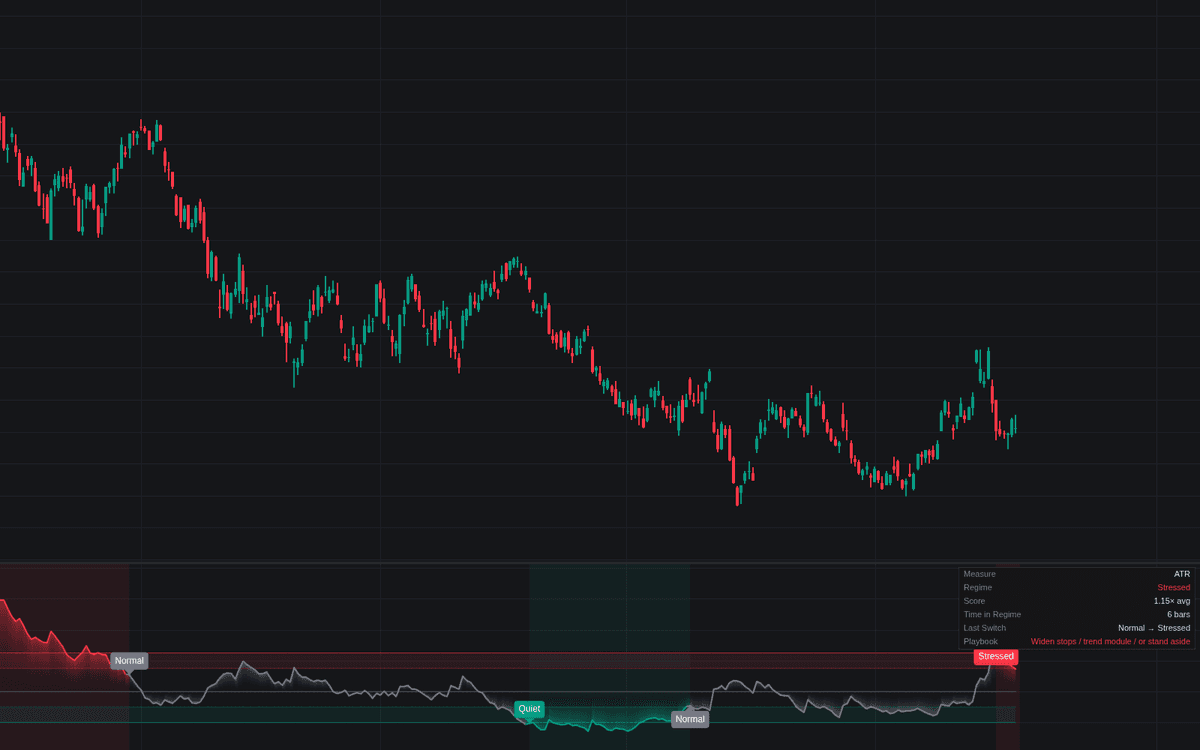

Volatility Regime Switches turns volatility into a committed state (Quiet, Normal, or Stressed) and marks the bar each change commits. The definitive build of the volatility regime switch pattern, it normalizes a chosen measure against its own long-run norm and lets a hysteresis-buffered state machine act on the label. The pane plots the Regime Score, its Baseline, the switch levels with shaded buffers, switch markers, and a playbook dashboard.
How to Trade the Volatility Regime Switches?
- Switch into Stressed: volatility above its norm. Widen stops, lean on trend logic, or stand aside.
- Switch into Quiet: compression. Tighten stops, favor reversion tactics.
- Switch into Normal: back at the norm; baseline parameters apply.
- Persistent background blocks: thresholds describe real regimes; flickers mean they are too tight.
It gates other volatility tools rather than giving entries; alerts fire on committed switches only.
Volatility Regime Switches Settings
- Volatility Measure (default ATR): Realized Volatility and Bollinger Band Width are drop-ins.
- Measurement Length (default 14): the fast side of the comparison.
- Normalization (default Ratio to Average): or Percentile Rank, 0-100.
- Baseline Lookback (default 100): the slow side; longer switches less often.
- Ratio · Stressed ≥ (default 1.25), Quiet ≤ (default 0.80), Ratio Hysteresis (default 0.10): ratio-mode arming levels and buffer.
- Percentile · Stressed ≥ (default 80), Quiet ≤ (default 20), Percentile Hysteresis (default 10): the percentile equivalents.
- Confirmation Bars (default 2): bars a candidate must hold to commit.
- Evaluate on Closed Bars (default enabled): live states match a closed-bar replay.
- Dashboard and style toggles control the panel, markers, zones, and background.
Frequently Asked Questions

Original indicatorBuilt in-house by LuxAlgo
The Library is free. Quant makes it yours.
Pull any concept or indicator into Quant: rebuild it, retune it, or turn it into a backtested strategy of your own.