Runaway Gap
 By LuxAlgoJun 5, 2026
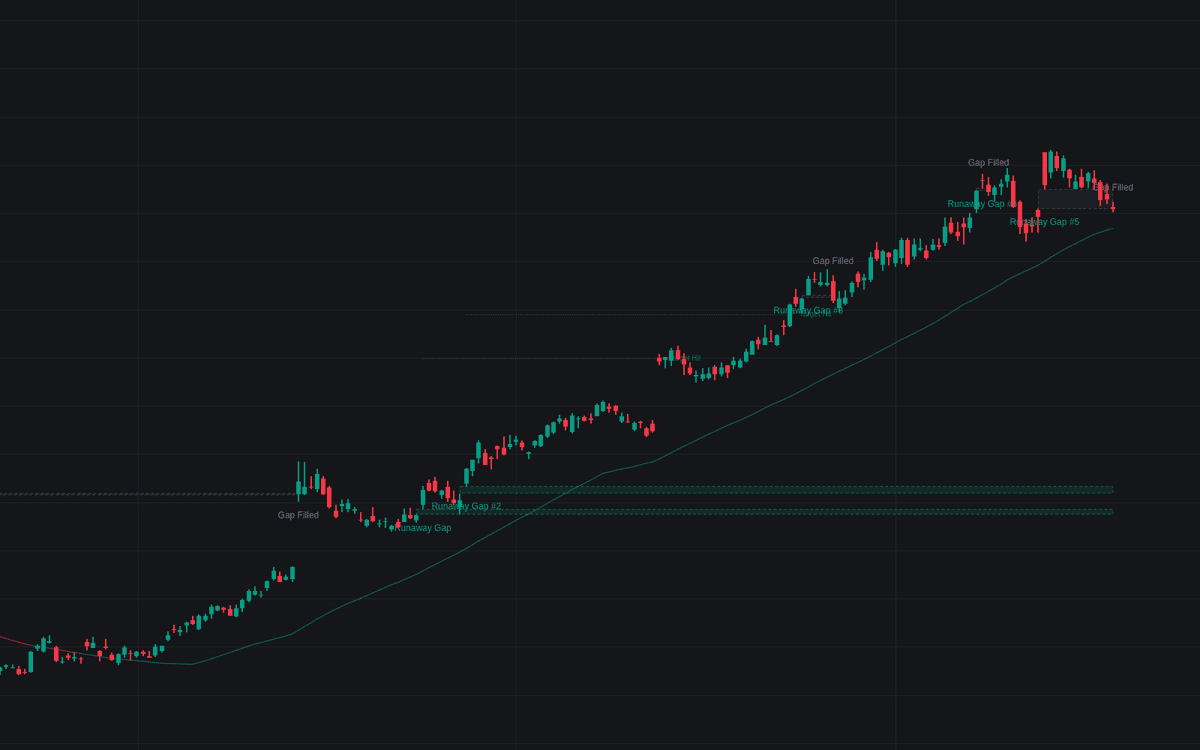

Runaway Gap separates the mid-trend continuation gap from every other gap a chart prints, the first dedicated implementation of the runaway gap. A qualifying bar must open entirely beyond the previous bar's range, clear a minimum size in percent of price or ATR units, print with an established trend, and carry conviction volume without frenzy. Each accepted gap is boxed and extended forward, numbered within its trend, and paired with the classical measuring-gap projection: the trend-origin-to-gap-midpoint distance extended beyond the gap.
How to Trade the Runaway Gap?
- Gap prints: a with-trend continuation signal; the untraded zone is expected support in an uptrend, resistance in a downtrend, and the Gap Zone Retest alert fires when price first returns to it.
- Measured target: the dotted Target line is a coarse objective for what remains of the move. The estimate turns ambiguous once a trend prints several gaps.
- Gap filled: a decisive close that re-enters the zone fades it to gray and breaks the continuation case: the trend had less behind it than it appeared, or the gap was exhaustion in disguise.
Runaway Gap Settings
- Minimum Gap Size (default 0.1) with its unit selector (default % of Price; ATR available) and ATR Length (default 14): the size floor.
- Trend Basis (default SMA) with length (default 50): the average defining trend direction.
- Established Trend (bars) (default 10): bars price must already hold the trend side, filtering launch-point gaps of breakaway territory.
- Apply Volume Filter (default on) with Volume Average Length (default 20), Minimum Volume (x Average) (default 1) and Maximum Volume (x Average) (default 3).
- Measured Target Projection (default on); style: Pattern Labels and Show Trend Basis (both on).
Frequently Asked Questions

Original indicatorBuilt in-house by LuxAlgo
The Library is free. Quant makes it yours.
Pull any concept or indicator into Quant: rebuild it, retune it, or turn it into a backtested strategy of your own.