Shark
 By LuxAlgoMay 27, 2026
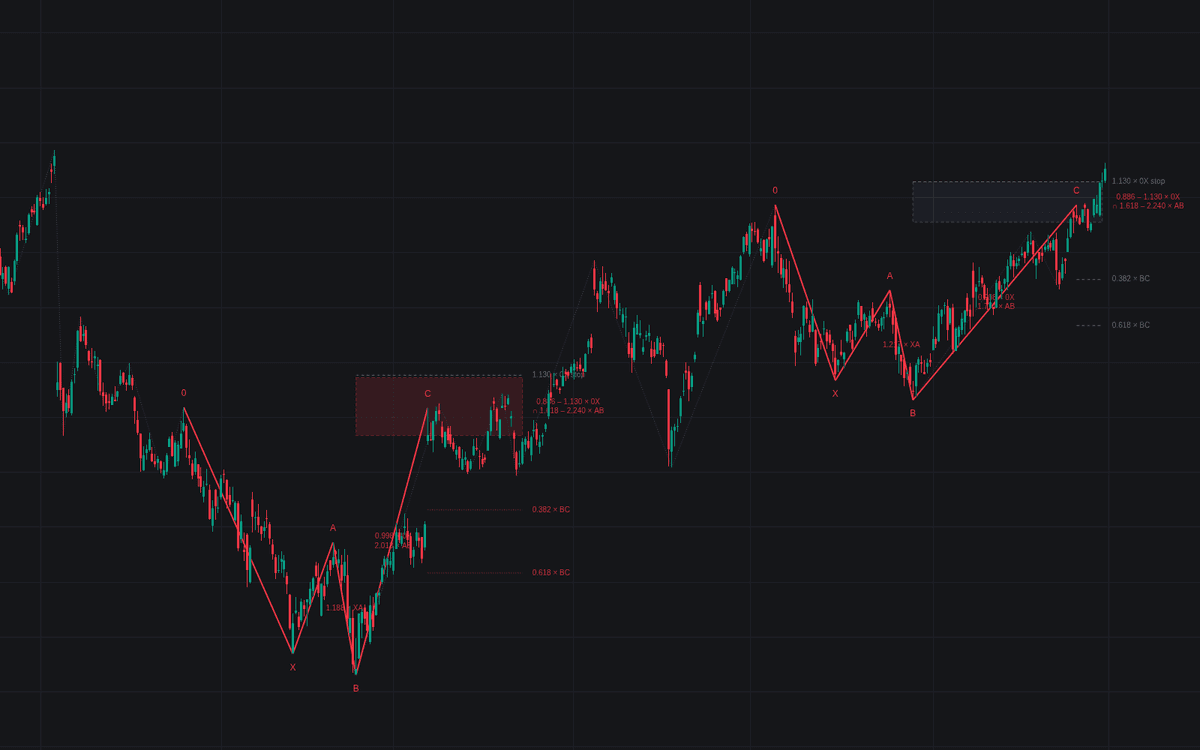

Shark detects the harmonic structure whose middle section is a failed breakout, managed through its full life cycle, the first faithful implementation of the Shark. From a swing zigzag it qualifies the 0, X, A, B sequence when the AB leg overruns the X pivot into the 1.13-1.618 band of XA, then projects the completion band across the whole 0X leg, restricting the reversal zone to the confluence when the 1.618-2.24 extension of AB overlaps it. Point and ratio labels report every measured value, so the geometry can be checked, not trusted.
How to Trade the Shark?
- Setup: the zone is projected the moment B qualifies, planning room before price arrives; a run beyond B without reaching the zone retires it.
- Completion and reaction: trading into the zone completes the pattern, but C stays live while price probes deeper. The reaction close back through the near edge freezes C and prints the targets.
- Staged targets: dotted lines where the final BC leg retraces 0.382 and then 0.618, the fast profit-taking the wide band pushes management toward.
- Invalidation: a decisive close past the far 1.13 measurement of 0X grays the drawings. Treat the move as a continuation instead.
Shark Settings
- Swing Length (default 8): pivot length forming the 0, X, A and B points; larger values find rarer structures.
- AB / XA Range (defaults 1.13 and 1.618): the required overextension beyond X.
- C / 0X Range (defaults 0.886 and 1.13): near and far edges of the completion band.
- BC / AB Range (defaults 1.618 and 2.24): the confluence projection from B.
- Require AB Confluence (default off): accept only structures whose two projections overlap.
- Target 1 (BC Retracement) (default 0.382) and Target 2 (BC Retracement) (default 0.618).
- Style: Point Labels, Ratio Labels, Target Lines, Invalidation Line, Show Swings (all on).
Frequently Asked Questions

Original indicatorBuilt in-house by LuxAlgo
The Library is free. Quant makes it yours.
Pull any concept or indicator into Quant: rebuild it, retune it, or turn it into a backtested strategy of your own.