Trading-range Position
 By LuxAlgoJul 20, 2026
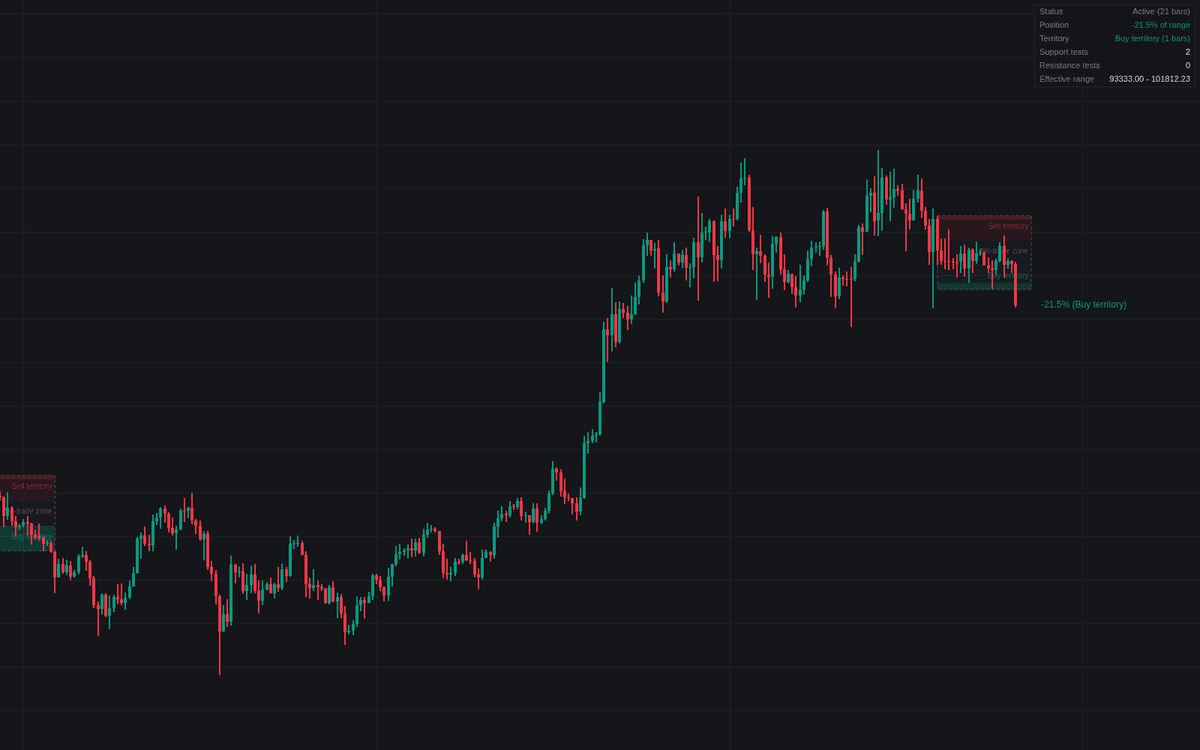

Trading-range Position makes location inside a range a first-class reading: when a compressed window confirms a range, the build splits it into a grid and reports where every close sits, the first dedicated build of trading-range position. Buy territory fills the lowest subdivision, sell territory the highest, the no-trade zone the middle; a live label states position as a percentage of the range plus its territory.
How to Trade the Trading-range Position?
- Territory entries: alerts fire when price enters the lower or upper subdivision, where structural stops are smallest relative to the ride across the range.
- No-trade zone: a return to the middle is alerted too. Neither location nor information favors range entries there.
- Edge resets: a recovered penetration resets the effective extreme the way a spring resets a working low; sustained closes beyond an edge resolve the range.
Edge bands span the swings that tested each side, a companion to the other Wyckoff range studies.
Trading-range Position Settings
- Formation Length (default 20): detection window whose extremes seed support and resistance.
- Maximum Range Height (default 3) with Volatility Baseline (default 200): compression ceiling in ATR multiples, and the ATR length behind it.
- Swing Length (default 5): bars each side confirming edge-test swings.
- Breakout Confirmation (default 2): consecutive closes beyond an effective extreme that resolve the range.
- Edge Reset Sensitivity % (default 5): minimum penetration depth (share of range height) reported as a reset.
- Subdivision (default Thirds): Thirds or Quarters as the position grid.
- Show Dashboard (on, Top Right, Small); style: Territory Fills, Edge Test Bands, Position Label, Keep Previous Ranges (all on), Edge Reset Markers (off).
Frequently Asked Questions

Original indicatorBuilt in-house by LuxAlgo
The Library is free. Quant makes it yours.
Pull any concept or indicator into Quant: rebuild it, retune it, or turn it into a backtested strategy of your own.