Concept
Zone Scoring & Refinement
Zone Scoring & Refinement, also known as base quality, departure strength, freshness, distal/proximal lines, is a Support/Resistance & Levels concept. The Library holds 1 implementation, a working definition you can pull into Quant.
Top Zone Scoring & Refinement indicator
The top custom implementation, built on the original standard Zone Scoring & Refinement formula.
1 total
The Zone Scoring & Refinement implementation below can become a backtested trading strategy — describe your rules and Quant writes the code.
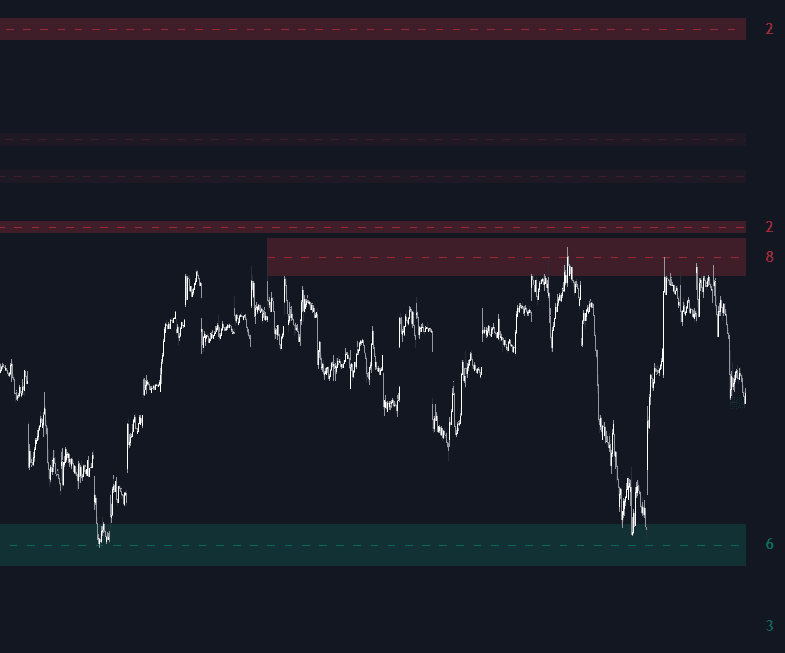
What is Zone Scoring & Refinement?
Zone scoring and refinement is the rule set supply-and-demand traders use to grade a supply or demand zone before trusting it. Scoring reads the zone's anatomy: base quality (a brief, tight base of a few candles outranks a long, choppy one), departure strength (the faster and more one-sided the leg away from the base, the stronger the implied imbalance), and freshness (an untested zone still holds its unfilled orders, and every revisit spends some of them). A fresh zone born from a short base and an explosive departure sits at the top of the hierarchy.
The grading vocabulary comes from the retail supply-and-demand tradition of the 2000s, and its best-known popularizer, trading educator Sam Seiden, graded zones with a checklist he called odds enhancers: departure strength, time spent at the level, freshness, and room to the next opposing level. Most scoring systems in circulation today are recognizable descendants of that checklist. None of it is tested science; these are codified heuristics for judging where meaningful imbalance may remain.
Refinement then tightens the drawing. The proximal line is the zone edge nearest current price and the distal line is the far edge; conventions differ on anchoring them to candle wicks or bodies. Body-drawn zones are tighter, giving better entry prices but more frequent wick-throughs; wick-drawn zones are wider and more forgiving at the cost of a larger stop. Refinement also handles stacking, deciding whether overlapping zones merge into one or only the freshest, best-formed zone is kept.
Scoring exists for selectivity: any tool can paint dozens of rectangles, most deserve no attention, and a trader who respects every zone equally ends up fading every move. It works best alongside level interaction rules defining what counts as a test or a break, plus merging logic akin to level grouping algorithms for overlapping candidates.
How to score and refine a zone on the chart
Start from a marked zone, then grade and tighten it:
- 1Locate the base: the pause of a few candles before the strong move away. Small bodies and a short stay score high; long, messy congestion scores low.
- 2Grade the departure: full-bodied consecutive candles or a gap leaving the base imply genuine imbalance, while a sluggish, overlapping exit downgrades the zone.
- 3Count retests since the zone formed: untested scores best, and a zone that has been deeply penetrated is usually discarded.
- 4Draw the proximal and distal lines under one convention, wicks or bodies, and keep it constant so stop distances stay comparable across trades.
- 5Resolve stacking: merge overlapping zones into one wider area or keep only the freshest, best-formed candidate, noting when a higher-timeframe zone contains yours.
How traders use it
- To rank competing zones: when price approaches several stacked candidates, score them on base quality, departure strength, and freshness so that only the top-ranked zones justify an entry or an alert.
- To place orders mechanically: the proximal line serves as the entry trigger and the distal line anchors the stop, which makes the wick-versus-body drawing choice a direct input to risk per trade.
- As a context gate: even a high-scoring zone is skipped when the bigger picture argues against it, for example a demand zone directly beneath heavy higher-timeframe supply or a major resistance level.
- To weigh confluence: a zone overlapping an independent level, such as a Fibonacci retracement, floor pivot, or prior period level, moves up the ranking because unrelated methods agree on the price.
- To declutter automated charts, where strength classifiers render or alert on only the top-graded zones.
Zone scoring vs adjacent level concepts
Supply & Demand Zones: Zones are the raw material; scoring and refinement is the quality control. Identification asks where an imbalance formed, scoring asks which zones still deserve capital, and refinement fixes where the edges sit.
S/R Zone: Classic support and resistance logic reads repeated touches as evidence of strength. Zone scoring inverts that premise: each touch consumes the resting orders behind the zone, so freshness outranks touch count. The two frameworks can mark the same price yet grade it oppositely.
Level Interaction Rules: Scoring grades a zone before price arrives; interaction rules judge what happens on arrival, defining touches, rejections, and breaks. A score's freshness component depends directly on how those interactions are counted.
Concept family
Support/Resistance & Levels
38 concepts mapped · 38 in the Library
Zone Scoring & Refinement FAQ
Turn Zone Scoring & Refinement into a trading strategy.
Take the implementation from this page into Quant, then build on it, backtest it on real data, and keep refining it in conversation.