Concept
Bullish/bearish Order Block
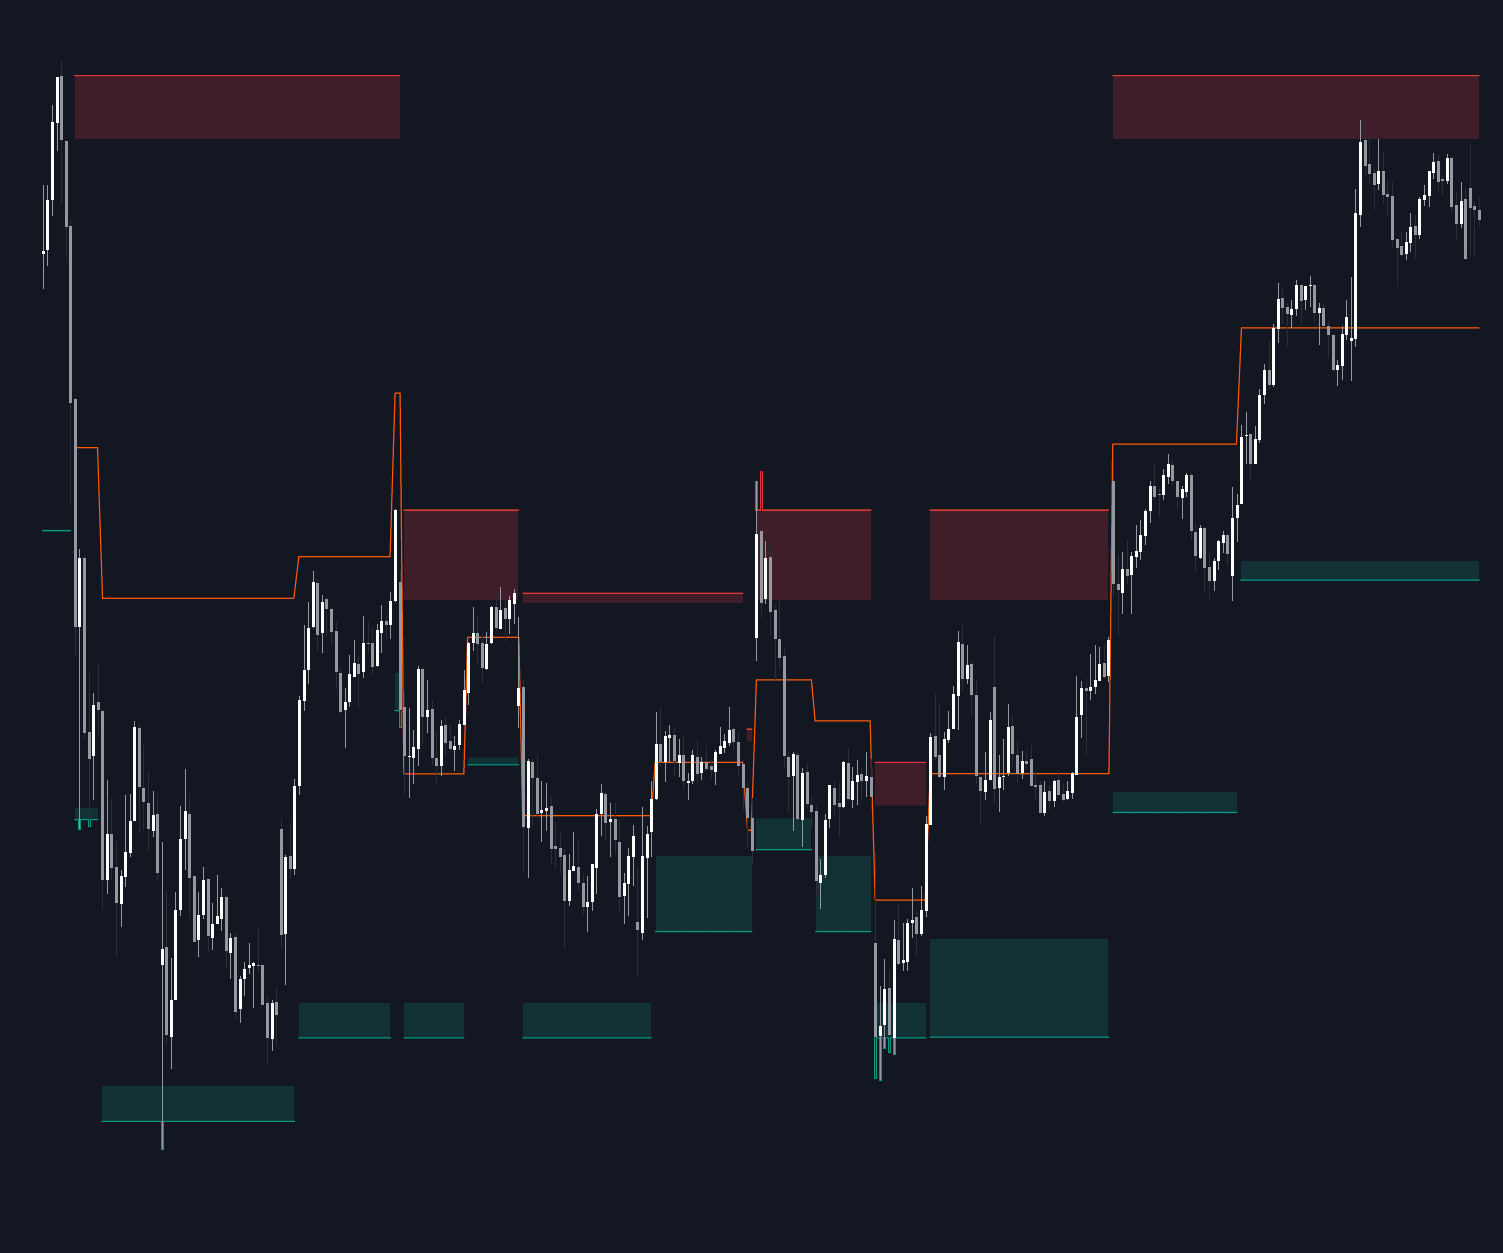
Bullish/bearish Order Block is a Smart Money Concepts / ICT concept. The Library holds 11 implementations, each one a working definition you can pull into Quant.
Top Bullish/bearish Order Block indicators
The top custom implementations, built on the original standard Bullish/bearish Order Block formula.
11 total
Every Bullish/bearish Order Block implementation here is strategy-ready: open one in Quant, set your rules, and it backtests automatically.
.png&w=3840&q=75)
.png&w=3840&q=75)
What is a Bullish/bearish Order Block?
An order block is the last candle that closed against a move before the move took off. The final down-closing candle (or consecutive group of them) before an impulsive rally is a bullish order block; the final up-closing candle before an impulsive decline is a bearish one. Smart Money Concepts / ICT traders read that candle as the footprint of position-building: the place where large orders were absorbed just before price was driven away, leaving a zone that may be defended if price returns.
The candle alone is not the concept. What follows it is. A candidate only earns the label when the move away shows displacement: speed and range that produce a break of structure or trade through a prior swing, ideally leaving a fair value gap behind. Many traders grade a block higher when its candle first ran a nearby low or high, a liquidity sweep into the zone before the reversal out of it.
Order blocks matter because they turn support and resistance into something testable: a precise origin for the move, a defined invalidation beyond the far edge of the zone, and a repeatable entry logic on the return. They also fail routinely (price trades straight through plenty of them), so the block is the start of a checklist, not the end of one.
How to identify a bullish or bearish order block
Work backward from the move that validates the block, not forward from a promising-looking candle.
- 1Find the displacement first. Look for an impulsive, one-directional leg that breaks a structural level or trades through a prior swing high or low. No displacement means no order block, whatever the candle looks like.
- 2Step back to the last opposite candle. The final down-closing candle before a bullish leg (or up-closing candle before a bearish leg) is the block; a run of consecutive opposite candles can be boxed as a single zone.
- 3Grade the context. Stronger blocks sweep a nearby high or low just before the move, leave a fair value gap in the leg away, and sit on the sensible side of the current range (bullish blocks in discount, bearish in premium), in agreement with higher-timeframe structure.
- 4Mark the zone and define failure in advance. Draw the candle's full high-to-low range (or refine to the body or its 50% mean threshold), and treat a decisive close through the entire zone as invalidation.
How traders use it
- As an entry on the return: once displacement confirms the block, price trading back into the zone (often called mitigation) is the cue to look for a reaction, with the stop beyond the far edge. Because many blocks get run straight through, models commonly also demand a lower-timeframe change of character inside the zone before committing.
- As a zone to refine: a higher-timeframe block can span an unusable range, so traders isolate the body, the 50% mean threshold, or a nested gap within it; the conventions and trade-offs are covered under order block anatomy & refinement.
- As a bias filter: candidate blocks are everywhere, so most get discarded. Keep the ones aligned with the structure you are trading and positioned on the right side of the range, and leave counter-trend blocks alone unless structure shifts first.
- As failure information: a block that breaks cleanly is not noise. The same zone approached from the other side is then read as a candidate breaker block in the new direction, and a string of failed blocks on one side is an early tell that the displacement behind them is no longer being defended.
Order block vs neighboring concepts
Breaker Block: A breaker is an order block after it fails: price traded through the zone and the retest arrives from the opposite side. Order blocks are traded with the original displacement; breakers are traded with the break that destroyed them.
Supply & Demand Zones: The same core observation (price left a base impulsively) without the SMC rulebook. Supply and demand marks broader zones by looser conventions; an order block is the stricter candle-level version, usually required to come with displacement, a structure break, or a sweep.
Fair Value Gap: The gap is the imbalance inside the move; the order block is the candle the move launched from. The two often stack into one setup, but an FVG is the span price crossed in a single fast pass (left open between the first and third candles' ranges), while a block is a fully traded candle range.
Rejection Block: Built from the wick at a swing extreme rather than the body of the last opposite candle. A rejection block marks a rejected high or low after a liquidity run; an order block marks the origin of the displacement itself.
More Bullish/bearish Order Block implementations
Concept family
Smart Money Concepts / ICT
54 concepts mapped · 54 in the Library
Bullish/bearish Order Block FAQ
Turn Bullish/bearish Order Block into a trading strategy.
Take any implementation from this page into Quant, then build on it, backtest it on real data, and keep refining it in conversation.