Concept
Squeeze Release Direction
Squeeze Release Direction is a Volatility concept. The Library holds 1 implementation, a working definition you can pull into Quant.
Top Squeeze Release Direction indicator
The top custom implementation, built on the original standard Squeeze Release Direction formula.
1 total
Want to trade Squeeze Release Direction? The implementation below is one prompt away from a backtested strategy in Quant.
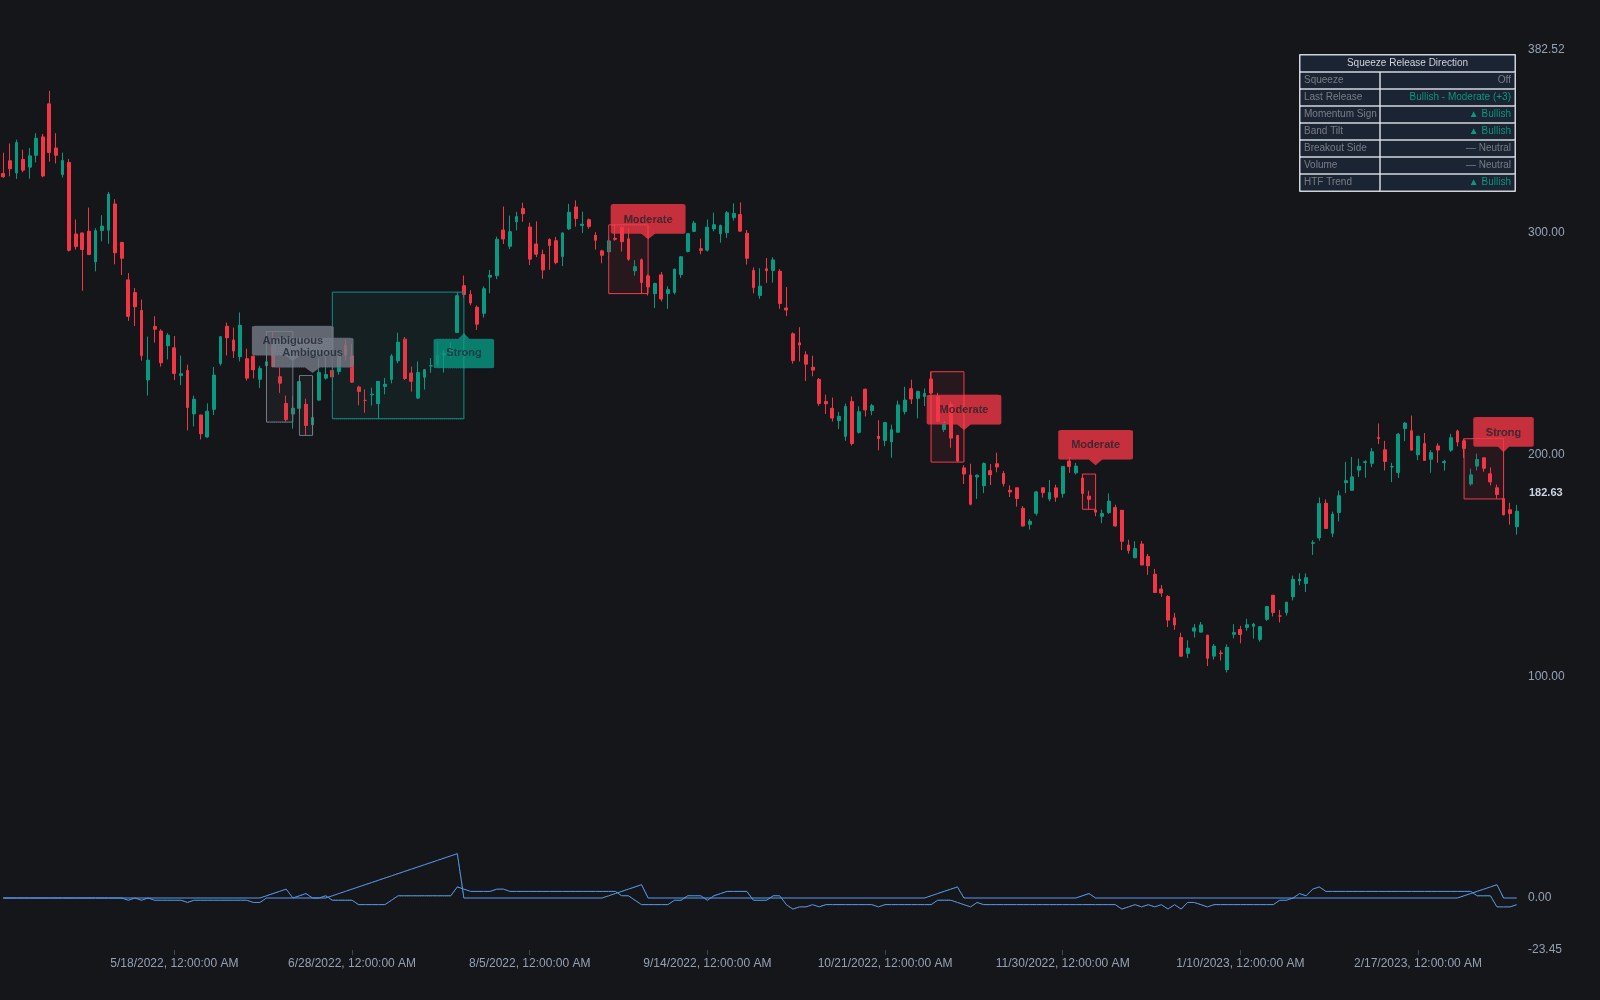
What is Squeeze Release Direction?
A squeeze flags compressed volatility and likely expansion, but it is direction-neutral. Squeeze release direction is the follow-on question: which way the move resolves once the squeeze fires. In the TTM Squeeze convention popularized by John Carter, the release is traded in the direction of a momentum histogram at the moment the bands re-emerge from the Keltner Channel; in the Bollinger Squeeze tradition, the cue is the side on which price breaks out of the bands.
Direction is the unreliable half of the squeeze trade. John Bollinger documented the head fake, where the first post-squeeze move runs one way before the real expansion goes the other, which is why most release rules demand confirmation: a close beyond the band rather than a tick beyond it, a structure break, volume expansion, or agreement from the higher-timeframe trend. The compression itself is the dependable observation; the direction call remains a hypothesis until confirmed.
The direction evidence stacks from several independent sources. The momentum histogram supplies sign and slope, expanding momentum into the fire being the strongest version of Carter's cue; the coil's own geography testifies, since price compressing against the top of its range, riding the basis line's upper side, leans differently than a coil hugging support; BandWidth trajectory times the fire itself; structure adds the skew, compression directly beneath resistance resolving downward more grudgingly than compression atop reclaimed support; and the higher-timeframe trend remains the heaviest single vote, releases with it enjoying the wind, releases against it fighting for every point.
Execution styles split on whether to call the direction at all. The directional camp pre-commits on the evidence stack and demands a confirmation event, a close beyond the band with follow-through, before full size; the agnostic camp brackets the coil with stops on both sides and lets the market self-select, paying for the neutrality whenever a head fake triggers both legs. Timing-focused builds add clocks and filters around the fire, and every style shares the failure protocol: a release that reverses back through the coil is the head fake announcing itself, exit or reverse, never argue.
How to identify the likely release direction
The squeeze is a fact; the direction is an evidence-weighing exercise with a confirmation gate.
- 1Confirm the squeeze is active and maturing, by band-in-channel state or a long-lookback BandWidth low.
- 2Assemble the directional evidence: momentum histogram sign and slope, which side of the basis price coiled on, and the structure above and below the compression.
- 3Weigh the higher-timeframe trend as the heaviest vote, discounting release calls that would fight it.
- 4Pre-commit the plan: a directional entry awaiting its confirmation event, or a two-sided bracket that lets the break choose.
- 5Manage the release: full size only after a confirmed close beyond the compression with follow-through, and treat a reversal back through the coil as the head fake it is.
How it's calculated
Marks the bar where a Bollinger Band squeeze releases from inside the Keltner Channel and uses the sign of a momentum value to label the expected breakout direction.
This follows John Carter's TTM Squeeze convention; the widely used open-source ports apply the same conditions.
Some platforms build the Keltner Channel or the momentum midline from an EMA instead of an SMA, or average plain range instead of true range, which shifts squeeze timing slightly.
The label only reads the momentum sign; many traders also require the histogram to keep expanding for a few bars after release.
How traders use it
- As a momentum-sign rule: when the squeeze fires, enter in the direction of the momentum histogram and stay while momentum keeps expanding, exiting as it wanes.
- As a breakout rule: trade the side on which price exits the compression range, with confirmation filters to avoid the head fake, a squeeze-specific form of false breakout.
- As a bias overlay: pre-assign the expected release direction from the higher-timeframe trend and take only the releases that agree with it, skipping counter-trend fires.
- As a bracket alternative: entry stops on both sides of the coil with cancel-one logic sidestep the direction call entirely, accepting double-trigger whipsaw risk as the price of neutrality.
- With a head-fake protocol: a release that fails and reverses through the compression zone converts to an exit or a stop-and-reverse, since the failed first move is itself the classic prelude to the genuine expansion opposite.
Release direction vs related squeeze concepts
TTM Squeeze: The TTM tool answers when: bands inside the channel, squeeze on, bands out, fired. Release direction is the follow-on question the tool's momentum histogram was bolted on to answer, and the histogram's sign at the fire remains that tradition's canonical cue.
Bollinger Squeeze: The band tradition detects compression from BandWidth's own history and reads direction from the breakout side, with Bollinger's head-fake warning attached. Same two-part structure, different machinery: internal width statistics versus channel comparison, break side versus momentum sign.
Volatility Contraction Pattern: The campaign-scale cousin: weeks of successively tighter pullbacks inside a base, where the direction question is largely pre-answered by the base's structure and the buy point sits at its boundary. Squeeze releases ask daily what the VCP asks once per base.
Concept family
Volatility
57 concepts mapped · 57 in the Library
Squeeze Release Direction FAQ
Turn Squeeze Release Direction into a trading strategy.
Take the implementation from this page into Quant, then build on it, backtest it on real data, and keep refining it in conversation.