Concept
Classic Bar Setups
Classic Bar Setups, also known as Oops pattern (Williams), Gimmee bar, are Chart & Candlestick Patterns concepts. The Library holds 1 implementation, a working definition you can pull into Quant.
Top Classic Bar Setups indicator
The top custom implementation, built on the original standard Classic Bar Setups formula.
1 total
From studying Classic Bar Setups to trading it: take the implementation below into Quant and backtest it instantly.
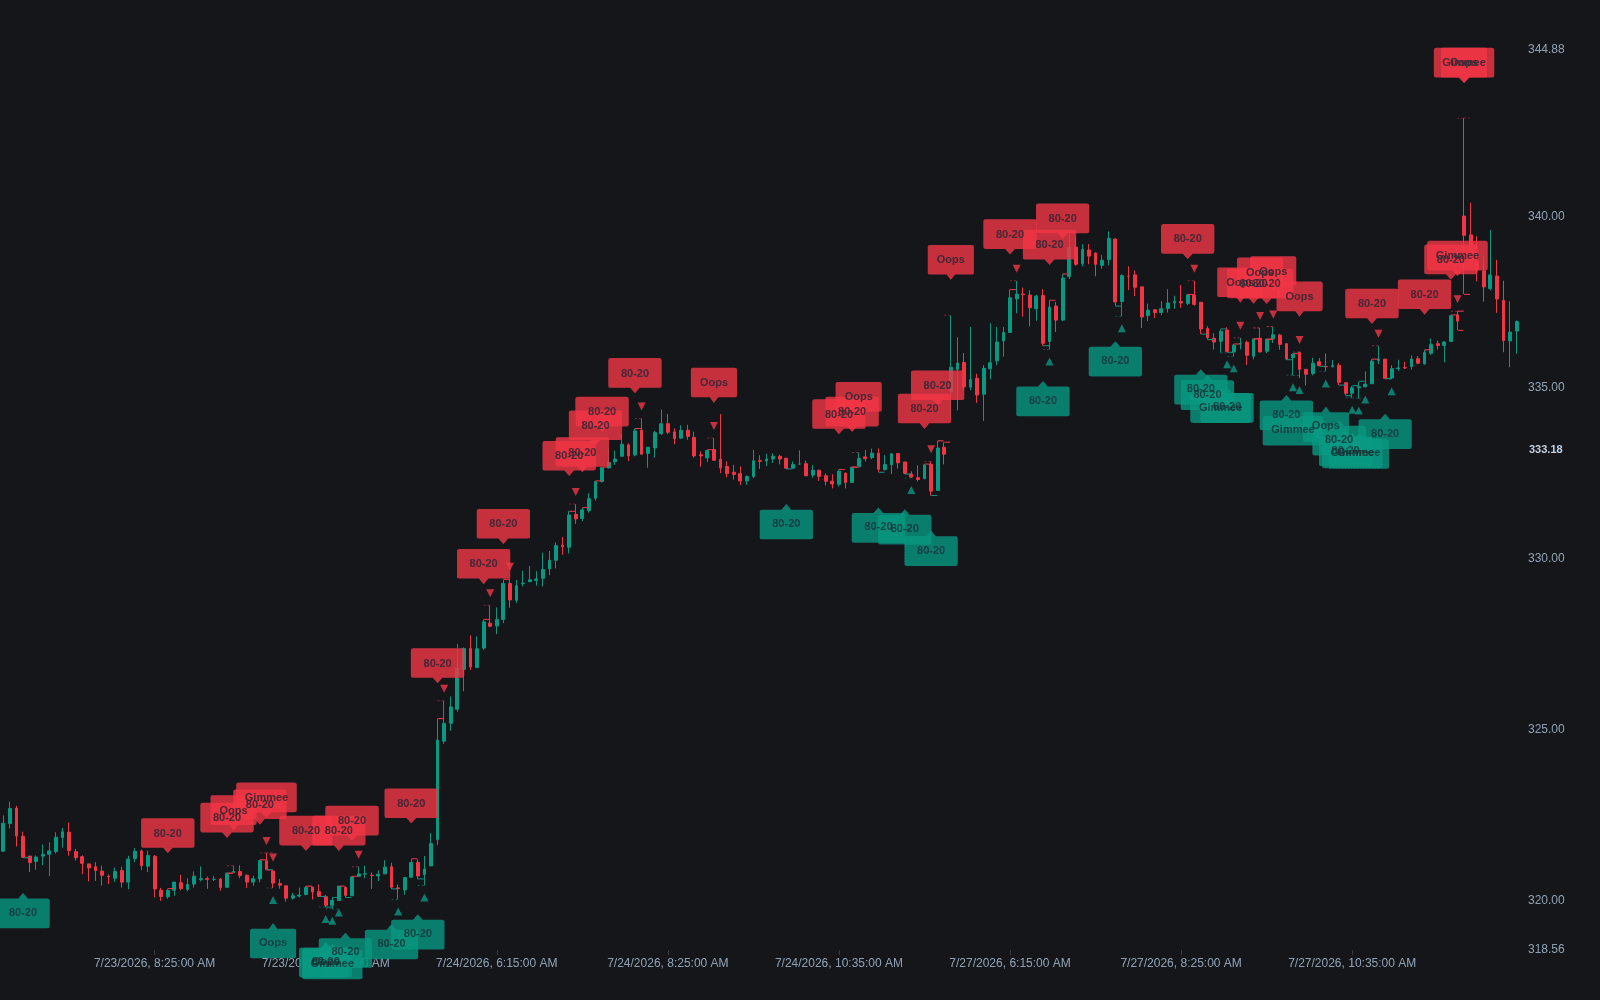
What are Classic Bar Setups?
Classic bar setups are the named one- and two-bar entries of late twentieth-century trading literature: patterns like Larry Williams' Oops, Joe Ross' gimmee bar, and 80-20 style reversal bars. What separates them from generic candlestick names is that each ships as a complete rule: a precise bar geometry, an entry level, a direction, and usually a stop, rather than a shape left to interpretation.
The catalogue is a product of the 1980s and 1990s systems-trading books and seminars. Williams described Oops across his short-term trading work, Ross laid out the gimmee bar in his day-trading books, and the 80-20 idea was popularized in the Connors and Raschke Street Smarts collection, which built session-reversal rules on bars that open near one extreme and close near the other. The shared style is unmistakable: small, testable rules with names that made them teachable.
Most of them encode the same underlying event, a trapped initial move. Oops fades an opening gap beyond the prior day's extreme once price trades back through it; the gimmee bar fades a push into the edge of a trading range when the pressing bar closes against its own direction; 80-20 bars (open near one extreme of the day, close near the other) flag potential next-session reversion. Each is a bar-scale false breakout with the trigger written down.
Their durability is uneven, and honestly so. The setups were codified on pit-era daily bars in gap-prone futures markets, and structural changes since, decimalization, around-the-clock sessions, thinner opening gaps, have altered how often the raw conditions even occur. What survives best is the architecture: location thesis plus objective trigger plus predefined stop, which is why the setups remain reference designs for traders building modern rules on the same trap logic.
How to identify classic bar setups on a chart
Each named setup has its own geometry, but they are located and executed the same way.
- 1Fix the location thesis first: a session open beyond yesterday's extreme for Oops, a mature trading range edge for the gimmee, a full-range trend day for an 80-20 candidate.
- 2Check the qualifying bar's anatomy against the written rule: gap size, close position within the range, or the bar's relation to the prior extreme, with no discretion added.
- 3Place the trigger order where the rule says, such as a stop at the prior day's extreme for Oops or a tick beyond the gimmee bar's far side; no trigger, no trade.
- 4Set the stop the rule defines, typically beyond the trap extreme, so the failed-trap thesis and the exit are the same statement.
- 5Add a time-stop: setups keyed to opens and session extremes decay fast, so entries that have not triggered within their window are cancelled rather than chased.
How it's calculated
Rule-based single-bar entry setups: Larry Williams' Oops gap reversal at the prior bar's range and Joe Ross's Gimmee bar at the Bollinger Bands.
Williams defined Oops on daily bars, where the session open can gap beyond the prior day's range; if price never returns to the prior low or high, no trade occurs.
Ross restricts Gimmee bars to sideways markets moving between the bands; a band touch during a trend is not faded.
Both are discretionary entry patterns rather than complete systems, and exact filters (minimum gap size, tick offsets) vary by author.
How traders use it
- As mechanical triggers at chosen locations: because each setup defines its own entry and stop, traders bolt them onto a location thesis (a level, a session open, a range edge) as the execution rule.
- As backtest material: the definitions are objective enough to code, which is also the honest warning; results vary with market regime, so they need testing on the instruments and eras actually traded rather than trust on reputation.
- As a vocabulary for trap logic: even traders who never take the setups verbatim use them as clean descriptions of failed opens, failed range pushes, and failed breakouts at bar scale.
- As scanner components: the geometries translate directly into screening conditions, flagging every symbol that printed a qualifying bar so the trader only reviews charts where a named rule is live.
- As overlays on bar-by-bar reading: the setups combine naturally with the surrounding candlestick patterns vocabulary, an inside bar stack before an Oops open or an outside bar engulfing a gimmee both change how much weight the trigger deserves.
Classic Bar Setups vs neighboring pattern families
Candlestick Patterns: Candlestick names describe shapes and leave execution to the trader. The classic bar setups are complete trades: shape plus entry level plus stop, which is why they backtest cleanly while candlestick claims often dissolve into definition disputes.
Two-bar Reversal: The two-bar reversal is a general strength-against-strength shape read at any extreme. Setups like Oops and the gimmee are narrower: they demand a specific context (a gap open, a range edge) and fire from a defined order level rather than a discretionary read.
Engulfing Bar: An engulfing bar is one bar swallowing another's range, a shape that appears anywhere. A classic setup wraps comparable geometry in location and mechanics, so two similar-looking bars can be one valid Oops and one meaningless engulfment mid-range.
Concept family
Chart & Candlestick Patterns
84 concepts mapped · 84 in the Library
Classic Bar Setups FAQ
Turn Classic Bar Setups into a trading strategy.
Take the implementation from this page into Quant, then build on it, backtest it on real data, and keep refining it in conversation.